Shorts are a closet essential due to their versatility and ease of use. However, choosing the ideal pair may often be a chore, especially when it comes to the length. The good news is that you can simply learn how to hem your shorts using a sewing machine, giving you the freedom to choose the perfect length for you.
This tutorial will teach you how to hem shorts using a sewing machine so that the finished product looks like it was done by a professional. Let’s read below “How to Hem Shorts With Sewing Machine?”
Materials Needed:
Let’s get the supplies you’ll need together before we begin the process:
- The shorts you want to hem.
- The measuring tape was used to get the correct dimensions.
- Use chalk or a fabric marker to designate where to cut and stitch.
- Use scissors to trim away any surplus material.
- Select a sewing machine that works well with lightweight materials.
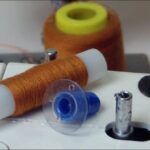
- Make sure the thread color goes well with the shorts you’re wearing.
- To keep the cloth from shifting, use pins.
- The iron is used to press the cloth and make neat, professional-looking hems.
A Step-by-Step Guide on How to Hem Shorts with a Sewing Machine
Step 1: Measure and Mark
The first step is to try on the shorts and measure the length you want. Take a measurement from the present hem to the desired length. Use chalk or a fabric marker to make a mark at this length on both shorts legs. Ensure that the marks are even on both sides to ensure symmetry.
Step 2: Calculate Hem Allowance
The hem allowance should then be determined. The hem allowance is the extra cloth that must be folded and sewn in order to form a finished hem. Shorts often have a hem allowance of 1 to 1.5 inches. Include this buffer in the measured distance, then draw a new line. To shorten the shorts by two inches with a one-inch hem allowance, for instance, you would draw a line three inches above the required length.
Step 3: Cut Excess Fabric
Follow the dotted line carefully as you cut to get rid of the extra material. To get a nice, straight cut, you should take your time. If the bottom of your shorts is already completed, you may keep the finished edge by snipping just above the stitching.
Step 4: Iron the Hem
Along the outlined hemline, fold the fabric’s raw edge to the wrong side. Press the fold with the iron to make a clean, finished look. This is a necessary procedure for creating a neat and tidy hem.
Step 5: Pin the Hem in Place
Pin the hem in place once it has been folded. Make sure the pins go through both layers of cloth by placing them perpendicular to the folded edge. Pinning will keep the cloth from moving while you stitch.
Step 6: Adjust Sewing Machine Settings
Make sure your sewing machine is set up properly before you begin. Lightweight fabrics, such as those seen in shorts, require a straight stitch. Standard hems require a stitch length of roughly 2.5 mm. Make sure the machine is sewing properly by testing the settings on a scrap of cloth.
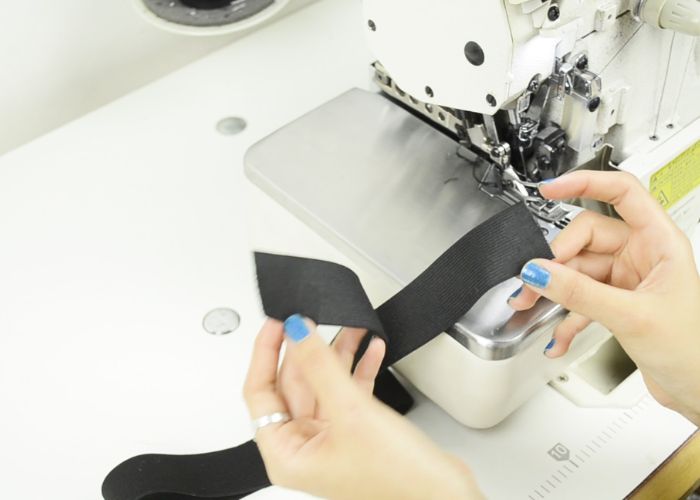
Step 7: Sew the Hem
Align the needle with the edge of the folded hem and place the shorts under the presser foot of the sewing machine. Take out the pins, drop the presser foot, and begin stitching. Sew all the way around the leg, being sure to backstitch at the beginning and end.
Step 8: Press the Hem
Iron the hem again when you’re done stitching it. This will help your shorts seem professional and fix the stitches. Ironing fragile clothes requires extra care to prevent scorching.
Step 9: Repeat for the Other Leg
Make sure both hems are the same length and even repeat the same steps for the second shorts leg.
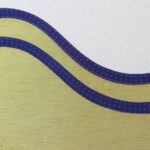
Step 10: Optional: Add a Decorative Touch
Adding a decorative stitch to the hem of your shorts is a great way to make them more unique. You may add some flair to your shorts by using one of the many decorative stitches available on most sewing machines. Before committing to the actual garment, test out several possibilities on a sample.
Tips and Tricks:
- Hemming shorts requires careful attention to detail. Carefully measure, mark, and stitch to ensure precision.
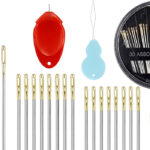
- Choose the Appropriate Needle Pick a needle that can handle the fabric’s thickness. A universal needle with a size between 70/10 and 80/12 should work nicely.
- Adjust your machine settings accordingly based on the fabric of your shorts.
- Contrasting thread is a riskier choice than matching thread, but it can provide interesting results.
Conclusion:
Hemming shorts with a sewing machine is a useful skill that allows you to tailor your outfit and get the right fit. You may hem your shorts to the length you want with confidence if you have the correct equipment and a little bit of time. I hope you like reading “How to Hem Shorts With Sewing Machine/”