Learn the step-by-step process of sewing bias tape around curves like a pro. Discover techniques, tips, and tricks to achieve neat and professional finishing. Follow this comprehensive guide to master the art of sewing bias tape on curved edges.
Bias tape, also known as bias binding, is a strip of fabric that is cut on the bias grain of the fabric. It is typically used to enclose or finish raw edges of the fabric, providing a clean and professional-looking result. Bias tape is characterized by its diagonal stretch, which allows it to conform smoothly around curves and contours.
Sewing bias tape around curves can be a challenging task for many sewists. It requires precision, attention to detail, and knowledge of specific techniques to achieve a neat and professional finish.
Whether you’re working on a garment, home decor, or craft project, understanding how to sew bias tape around curves is a valuable skill to have in your sewing repertoire.
In this comprehensive guide, we’ll delve into the intricacies of sewing bias tape on curved edges. From understanding the basics to exploring advanced techniques, we’ll equip you with the knowledge and confidence to tackle any curve with ease.
Let’s get started on our journey to mastering the art of sewing bias tape around curves.
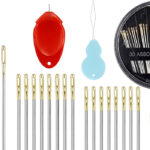
Before going further on how to sew bias tape around curves you must know about the supplies used in this process. The list of all the supplies and a brief description of each is given below.
It is used to finish raw edges and add decorative trims. You can either purchase pre-made bias tape or make your own by cutting fabric on the bias.
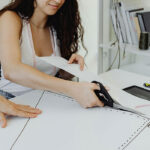
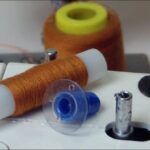
You’ll need fabric to make bias tape or to sew it onto. Choose a fabric that is suitable for your project and matches or complements the main fabric.
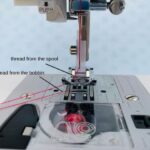
A sewing machine will make the process quicker and more efficient, but you can also sew bias tape by hand if you prefer.
Select a thread color that matches or complements your bias tape and fabric.
These are used to hold the bias tape in place while you sew. It’s helpful to have pins or clips that are suitable for use with your fabric.
Use fabric scissors to cut your bias tape and trim any excess fabric.
Iron is essential for pressing the bias tape and creating neat folds. Pressing the fabric before and during the sewing process helps achieve a professional finish.
A seam ripper can come in handy if you need to remove any stitches or adjust the bias tape.
If you’re working with thick or heavy fabric, a fabric glue or adhesive tape can help keep the bias tape in place while you sew.
A marking tool or chalk can be used to mark the sewing lines on your fabric, especially if you’re sewing a complex curve.
A rotary cutter is a tool that you can use to cut the fabric at an angle of 45 degrees.
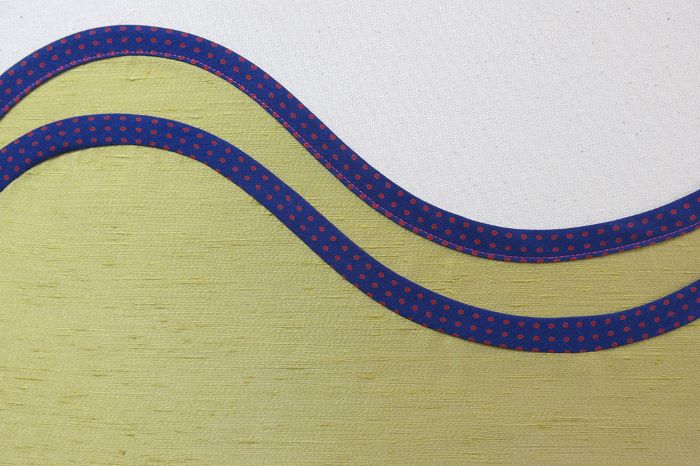
Flexibility: Bias tape’s unique diagonal stretch makes it incredibly versatile and ideal for finishing curved edges.
Durability: By enclosing raw edges, bias tape adds strength and durability to garments and other fabric items.
Aesthetics: Bias tape comes in a wide range of colors, prints, and textures, allowing you to add decorative touches to your projects.
Finishing Touch: It provides a neat and polished appearance to your sewing projects, concealing raw edges elegantly.
Sewing bias tape around curves requires a thoughtful approach and proper technique. By following these steps, you’ll be on your way to achieving beautifully finished curves that add a professional touch to your sewing projects.
Step 1: Prepare the Bias Tape

Cut bias strips: Begin by cutting bias strips from your chosen fabric. Bias strips are cut at a 45-degree angle to the fabric’s grain, allowing the tape to stretch and conform to curves effortlessly. Remember to account for the desired width and seam allowances.
Join bias strips: Sew the bias strips together at a 45-degree angle, creating a continuous length of bias tape. Trim any excess fabric and press the seam open.
Precaution
Use the right piece of fabric for bias tape. Use lightweight fabric. Avoid using stiff or heavyweight fabrics. Cutting bias tape at a precise 45-degree angle. Use a ruler or rotary cutter.
Step 2: Pin the Bias Tape to the Curved Edge
Begin at one end: Start by unfolding a small section of the bias tape and aligning it with the raw edge of your fabric, right sides together. Pin or clip the tape in place.
Ease the tape around the curve: As you work your way along the curve, gently manipulate the bias tape to conform to the shape. Use your fingers to ease and distribute the excess fabric evenly, ensuring a smooth finish. Pin or clip the tape at regular intervals to secure it in place.
Precaution
It’s a good idea to practice on a scrap piece of fabric before trying it on your main project. Pin or clip the bias tape to the fabric at regular intervals
Step 3: Stitch the Bias Tape in Place
Select your stitching method: Depending on your project and personal preference, you can choose from several stitching methods. Common options include topstitching, edge-stitching, or stitching in the ditch.
Start sewing: Begin sewing at the starting point, securing the bias tape to the fabric. Maintain a consistent seam allowance as you sew along the curve. If using a sewing machine, go slow and pivot frequently to maintain accuracy.
Deal with puckers: If you encounter puckers or fabric gathering, stop sewing with the needle down, lift the presser foot, and adjust the fabric. Smooth out any wrinkles or excess fabric before continuing.
Precaution
Take your time and sew at a slow and steady pace.
Step 4: Finish the Bias Tape
Trim excess fabric: Once you’ve sewn all the way around the curve, trim any excess bias tape and fabric. Leave a small tail of bias tape for a clean and professional finish.
Step 5: Fold and secure the bias tape
Fold and secure the bias tape: Fold the bias tape to the wrong side of the fabric, enclosing the raw edge. Press the tape in place, ensuring it covers the stitching line. Pin or clip the tape as needed.
Step 6: Complete the finishing stitch:
Stitch close to the folded edge of the bias tape, securing it in place. You can either stitch
Precaution
Regularly pause and examine your work as you sew around curves.
Step 7: Press and Finalize
Press the bias tape: To achieve a crisp and professional finish, use an iron to press the bias tape. Press the tape towards the wrong side of the fabric, ensuring it lies flat and smooth.
Inspect and make adjustments: Take a close look at your sewn bias tape around the curves. If there are any areas that need adjustment or re-stitching, now is the time to make those corrections.
Trim loose threads: Give your project a final touch by trimming any loose threads. This step helps to enhance the overall appearance and ensures a clean and polished look.
Precaution
Be cautious when pressing around curves to avoid flattening the natural curve of the fabric.
Practice and Refine
Learn from experience: Like any sewing technique, sewing bias tape around curves improves with practice. Don’t be discouraged if your first attempt isn’t perfect. Each project presents an opportunity to refine your skills and learn valuable lessons along the way.
Experiment with different fabrics: Different fabrics behave differently when it comes to bias tape application. Experiment with various fabrics to understand how they handle curves and adapt your technique accordingly.
Seek inspiration and guidance: Look for online tutorials, and sewing forums, or seek advice from experienced sewists to gather more tips and insights. Learning from others can help you expand your knowledge and discover new techniques.
Precaution
To do this properly seek inspiration and guidance from your tailor or any professional sewer.
- Choose the right fabric: Select a fabric that is suitable for bias tape application. Fabrics with a good amount of drape and flexibility, such as lightweight cotton or jersey, work well for curves. Avoid using stiff or heavyweight fabrics, as they can be more challenging to manipulate around curves.
- Test on scrap fabric: Before applying bias tape to your actual project, it’s a good idea to practice on a scrap piece of fabric. This allows you to familiarize yourself with the technique and make any necessary adjustments before working on your main project.
- Cut your bias tape accurately: Cutting bias tape at a precise 45-degree angle is crucial for optimal stretch and flexibility. Use a ruler and rotary cutter to ensure clean, accurate cuts. Uneven or jagged bias strips can lead to difficulties when sewing around curves.
- Pin or clip generously: Pin or clip the bias tape to the fabric at regular intervals, especially when working with curves. This helps keep the tape in place and ensures an even distribution of fabric along the curve. It also helps prevent the bias tape from shifting or stretching as you sew.
- Go slow and pivot: When sewing around curves, take your time and sew at a slow and steady pace. This allows you to have better control over the fabric and helps maintain accuracy. Additionally, remember to pivot frequently as you sew, stopping with the needle down, lifting the presser foot, and adjusting the fabric as needed.
- Avoid stretching the bias tape: While bias tape has inherent stretch, excessive stretching can cause distortion and affect the overall appearance of your finished project. Handle the bias tape gently and avoid pulling or stretching it while sewing around curves. Let the tape naturally ease into the curve without forcing it.
- Inspect and adjust as you go: Regularly pause and examine your work as you sew around curves. Check for any puckers, folds, or uneven stitching. If needed, stop sewing, lift the presser foot, and adjust the fabric to ensure a smooth and flat finish. Taking the time to make adjustments during the process can save you from potential issues later on.
- Press the bias tape carefully: After sewing, use an iron to press the bias tape and fabric. Be cautious when pressing around curves to avoid flattening the natural curve of the fabric. Use a pressing cloth or a tailor’s ham to help preserve the shape of the curves while achieving a crisp and professional look.
By following these precautions, you can minimize challenges and achieve excellent results when sewing bias tape around curves.
Mastering the art of sewing bias tape around curves opens up a world of creative possibilities in your sewing projects. With the techniques and tips provided in this guide, you’ll be able to achieve smooth, professional-looking results every time. So grab your supplies and start practicing, soon you’ll be sewing bias tape around curves like a pro.
Can a tailor make pants bigger or smaller?how to sew bias tape around curves
While pre-made bias tape is convenient, it may not always provide the best results on curved edges. Pre-made bias tape is usually cut on a straight grain and lacks the necessary flexibility to conform smoothly to curves. Creating your own bias tape allows you to tailor it to the specific curve you’re working on, ensuring a better fit and finish.
If your bias tape doesn’t lay flat on the curve, it’s likely due to inadequate distribution of excess fabric. Take the time to manipulate the tape and ease the excess fabric evenly along the curve. Use pins or clips to hold the tape in place while sewing. Going slow and making small adjustments as you sew can also help achieve a smooth and flat finish.
Clipping the bias tape along the curves helps to release tension and allows the fabric to lie flat. It’s especially crucial for tight or sharp curves. Make small, strategic clips on the seam allowance side of the fabric, taking care not to cut into the stitching line. This technique helps the bias tape shape to the curve more easily.
Puckering often occurs when there is excess fabric or uneven tension along the curve. To avoid puckering, go slow and take your time. Lift the presser foot periodically and adjust the fabric, smoothing out any wrinkles or gathering. Distribute the excess fabric evenly and ensure the bias tape lays flat against the fabric as you sew.
Absolutely! Sewing bias tape on curves can be done by hand. Use a small, neat slip stitch or whipstitch to secure the bias tape in place. Hand sewing allows for more control and precision, especially on intricate curves or delicate fabrics.
When you reach the end of your bias tape on a curve, fold the raw edge to the wrong side and overlap it with the starting point. Trim any excess fabric
Related posts:
 2024’s Best Sewing Patterns for Kids’ Clothing: Quick, Easy, and Fun
 Mastering Automatic Bobbin Winders: Essential Tips and Tricks for Beginners
 Step-by-Step Guide: Transferring Thread from Cone to Spool Efficiently
 A Beginner’s Guide to Perfectly Threading Your Sewing Machine: Upper and Lower Threads