At some point, every sewer will encounter a cone of thread that needs to be transferred onto a spool. While this may seem like a daunting task, it is quite simple with the right tools and techniques. In this guide, we will walk you through the step-by-step process of transferring thread from a cone to a spool.
How to Transfer Thread from Cone to Spool? There is no such tool made for this task. You have to use the technique to transfer the thread. In this post, we will discuss one of the techniques that I use for transferring threads.
Transferring thread from a cone to a spool can be necessary for a few reasons. One thread from a cone to a spool is for convenience. It can be easier to work with smaller spools of thread rather than a large cone. This is especially true if you are working on a small project or need to change thread colors frequently.
This technique can save you money. You didn’t need to buy five cones, four for your serger and one for your sewing machine. You can prepare five spools from a single cone.
Before we begin, you will need a few tools to successfully transfer thread from a cone to a spool. These tools include.
- A cone of thread
- Sewing machine bobbin winder or automatic bobbin winder
- A spool
- A bobbin
- A thread stand
- Tape or other adhesives
- A pair of scissors
To transfer the thread from a cone to a spool, you need to prepare a bobbin winder on the sewing machine. Pull the hand wheel to stop the movement of the needle while winding. If your sewing machine does not have a built-in bobbin winder, you can purchase one separately.
In this technique, we will use a bobbin and bobbin winder to transfer thread from cone to spools.
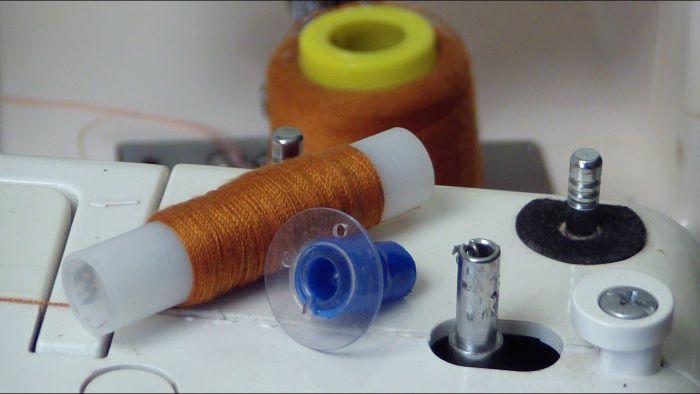
Take a bobbin and an empty spool. Use tape or adhesive to attach the spool to the bobbin as shown in the image. As there is no specific tool for this task so you need to follow this technique. We will use a machine bobbin winder and this gadget to shift the thread.
Wind a small amount of thread on the spool to initiate the process. If you have a hole in the spool, tie a knot to secure it in place. Adjust the tension of the thread using tension plates on the sewing machine. This tension adjustment will make sure that the thread winded is not too tight or too loose.
Now, turn on your machine, and begin winding the thread onto the spool. Keep an eye on the tension of the thread to ensure that it winds evenly onto the spool.
Once you have wound enough thread onto the spool, turn off your machine and trim the thread, leaving a tail of approximately two inches. Keep moving the thread up and down while winding the thread. This movement will provide an even winding of the thread.
If you will not move the thread up and down thread will not look nice and even.
To ensure that the thread does not unwind from the spool, tie a knot with the tail of the thread around the base of the spool.
Enjoy your newly transferred spool of thread Congratulations! You have successfully transferred the thread from a cone to a spool. Your newly transferred spool of thread is now ready to use for your next sewing project.
You must read How to hem shorts with a sewing machine
- 📢 If you find that your thread is breaking or tangling while winding onto the spool, try adjusting the tension on your machine.
- 📢 Use a spool cap that is the correct size for your spool to ensure that the spool of thread stays in place.
- 📢 Be patient and take your time. Transferring thread from a cone to a spool can be a tedious process, but with practice, you will become more efficient.
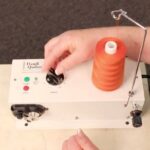
You can use a thread winder to transfer thread from cone to spool but such machines are expensive. If you will use this machine it will give a professional look to your work. You can wind each type of thread with this machine.
You must read How to use automatic bobbin winder?
If you are using a threader machine or any other technique you need to avoid mistakes. The mistakes that you can make are:
- Tangling: If the tension is not appropriate and the thread is not guided properly to the spool it may tangle. This will make the progress show. To avoid tangling of thread use a guide and appropriate thread.
- Uneven winding: If the thread is not wound evenly onto the spool, it can cause issues when using the thread in a sewing machine or other project. To avoid this issue keep moving the thread up and down. This movement will help in even winding the thread.
- Thread breakage: If the tension on the thread is too high or too low, it can cause the thread to break during the transfer process. Once the thread is broken it will disturb the sewing process. The machine will stop working midway
- Poor handling: Improper handling of the thread while transferring it from the cone to the spool can cause damage to the thread, such as fraying or knotting. To avoid this, handle the thread carefully, and try not to pull or tug on it excessively.
Transferring thread from a cone to a spool is a simple task that every sewer should know how to do. With the right tools and techniques, you can easily transfer thread and enjoy a hassle-free sewing experience. By following this step-by-step guide, you will be able to transfer thread from a cone to a spool like a pro in no time. If you have any problem with this guide ‘How to Transfer Thread from Cone to Spool’ feel free to contact us.
You must read Does 60 cotton 40 polyester shrink?


