As a sewing enthusiast, you know how important it is to have a good bobbin winder. It saves you time, effort, and frustration when you need to wind bobbins for your sewing projects. An automatic bobbin winder is a great investment because it does the job quickly and efficiently. However, if you’ve never used one before, you might be wondering how to use an automatic bobbin winder. In this article, we’ll guide you through the process, so you can start enjoying the benefits of an automatic bobbin winder in no time.
Types of the bobbin winder

Before learning how to use automatic bobbin winder, you must know about different types of bobbin winders. Here is the list of three main types of bobbin winders which are in use by professionals.
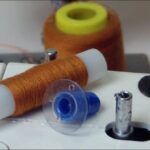
Stand-alone bobbin winder or portable bobbin winder
These are separate machines that are used to wind bobbins quickly and efficiently. They are often used by professional sewers who need to wind a large number of bobbins. If you are doing embroidery using different colors then it is the best bobbin winder. You can wind different bobbins using different colors.
With a portable universal bobbin winder, you can wind bobbins of all sizes. Just unscrew the sensor plate and move in forward or backward. For small-size bobbins move them forward and for larger bobbins move them backward.
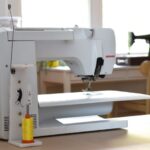
Sewing machine bobbin winders
Many modern sewing machines come with built-in bobbin winders that automatically wind the bobbin while you sew. This saves time and effort by eliminating the need to wind bobbins separately.
Handheld bobbin winders
These small, portable machines are designed to be held in the hand while winding bobbins. They are often used by quilters and other sewers who need to wind bobbins on the go.
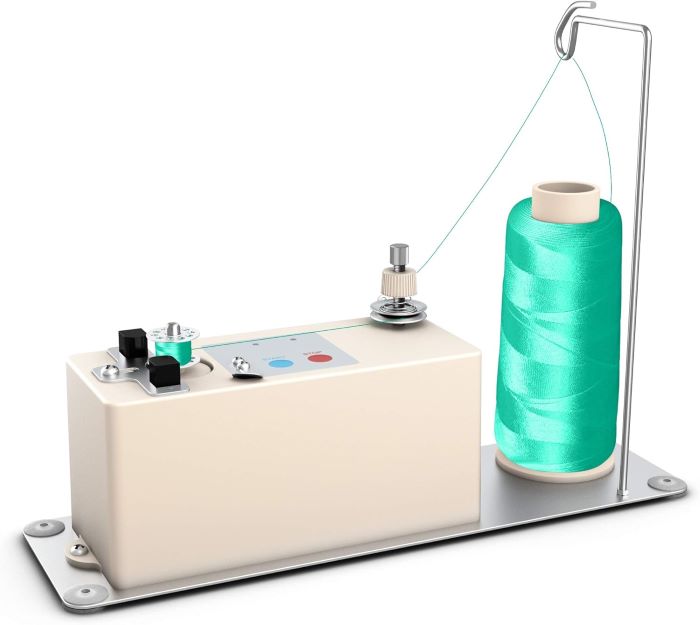
Before you learn how to wind a bobbin using an automatic bobbin winder you must know about the parts of the winder. The main parts of the bobbin winder are:
- Start/stop buttons
- Bobbin spindle
- Moter
- Thread guide
- Tension disc/plates
- Cutter
- Sensors
Start/stop buttons
A start button on a bobbin winder is typically used to initiate the winding process of the bobbin. Once the start button is pressed, the winder will begin rotating and wrapping thread around the bobbin.
On the other hand, a stop button is used to halt the winding process of the bobbin. This button is pressed when the desired amount of thread has been wound onto the bobbin, or if there is an issue with the winding process that needs to be addressed.
In more advanced bobbin winders sensors are installed. These sensors automatically stop or start the winder. You do not need to stop winding each time when the bobbin is full.
Bobbin spindle
A bobbin spindle is part of a bobbin winder that holds the bobbin in place while it is being wound with thread. It is a small metal or plastic rod. It is mounted vertically on the winder. The bobbin spindle usually has a notch or groove on one end that holds the bobbin securely in place. The other end is attached to the winder.
Moter
The motor of a bobbin winder is an electrical component that drives the winding mechanism of the winder. It is responsible for powering the spindle that rotates the bobbin. The motor is usually located inside the main body of the bobbin winder and is connected to the spindle.
Thread guide
A thread guide in a bobbin winder is a small metal or plastic part or a hole that helps guide the thread. It guides the thread from the spool to the bobbin. It is typically located near the spindle or tension plates. It is designed to keep the thread in a straight and even path as it is fed onto the bobbin.
Tension plates
Tension plates in a bobbin winder are small metal or plastic plates. These are designed to regulate the tension of the thread as it is being wound onto the bobbin. These are typically located near the spindle. Tension plates are positioned to create a slight amount of resistance to the thread as it passes through.
The tension plates are adjustable. These plates allow users to fine-tune the tension to accommodate different types and weights of thread. They are important for ensuring that the thread is wound evenly and tightly onto the bobbin, without becoming too loose or too tight.
Cutter
A cutter on an automatic bobbin winder is a small blade that is designed to cut the thread once the winding process is complete. It is typically located near the spindle and is activated when the winding process reaches its desired length or when the stop button is pressed.
Some models of automatic bobbin winders may have a manual cutter that can be operated by the user, while others may have a built-in automatic cutter that activates as soon as the winding process is complete.
Sensors
This sensor detects when the bobbin is full or when it needs to be changed. It can help to prevent overfilling or underfilling of the bobbin, which can cause problems during sewing.
A Step-by-Step Guide: How to use automatic bobbin winder
Step 1: Prepare Your Bobbin Winder
Before you start using your automatic bobbin winder, you need to make sure it’s set up correctly. Here are the things you need to do:
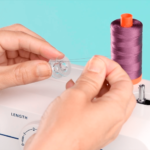
Wind the thread onto the bobbin: Before inserting the bobbin into the bobbin winder, wind a small amount of thread onto the bobbin by hand. This will help to secure the thread in place and prevent it from slipping or becoming tangled during the winding process.
Insert the bobbin into the bobbin winder: After winding the thread onto the bobbin, insert it into the bobbin winder. Make sure that it is inserted securely and that the thread end is positioned correctly.
Adjust the tension plates: If your bobbin winder has tension plates, adjust them according to the requirement. This will help to ensure that the thread is being wound onto the bobbin evenly and tightly.
Step 2: Wind the Bobbin
Once you’ve prepared your bobbin winder, it’s time to start winding the bobbin. Here’s how to use an automatic bobbin winder:
Turn on the bobbin winder: Most automatic bobbin winders have an on/off switch. Turn it on to start the bobbin winder.
Start winding the bobbin: Press the foot pedal (Sewing machine bobbin winders) or button to start the bobbin winder.
Monitor the bobbin: Watch the bobbin as it’s winding. Make sure it’s winding evenly and not too loose or too tight. Adjust the tension or other settings as needed to ensure that the resulting bobbin is of high quality.
Stop the bobbin winder: When the bobbin is full, the bobbin winder will automatically stop. If your bobbin winder doesn’t have an automatic stop, you need to monitor the bobbin and stop the winder when it’s full.
Step 3: Remove the Bobbin
Once the bobbin is full, it’s time to remove it from the bobbin winder. Here’s how to do it:
Remove the bobbin: Remove the bobbin from the bobbin winder shaft. Make sure you don’t drop the bobbin, as it might unwind and create a mess.
Cut the thread: Cut the thread with a pair of scissors or thread snips or cutter present on the bobbin winder.
Insert the bobbin into your sewing machine: Insert the bobbin into your sewing machine’s bobbin case or bobbin holder. The bobbin and sewing machine are ready to work.
You must read What is a Spool Pin on a Sewing Machine?
How do I use the machine bobbin winder?
How to use bobbin winder on sewing machine? To use the machine bobbin winder, first, make sure that the machine is turned off. Next, thread the machine and place the bobbin on the bobbin spindle. Pull the thread from the spool and insert it through the bobbin winding tension disc. Turn on the machine and press the foot pedal to start winding the thread onto the bobbin. Once the bobbin is full, the machine will stop automatically.
With an automatic bobbin winder sewing machine, you don’t need to fill the bobbin manually. The machine will automatically fill the bobbin when it is out of thread. Not even to worry about starting or stopping the machine.
Conclusion How to Use Automatic Bobbin Winder
Learning how to use an automatic bobbin winder is easy and can save you time and effort in winding bobbins for your sewing projects. Make sure to follow the steps and tips outlined in this article, and you’ll be able to make the most out of your automatic bobbin winder. Remember to always use the correct size and type of bobbin, hold the thread with your fingers while winding, and monitor the bobbin to ensure even winding. Happy sewing!
Must read Does 60 cotton 40 polyester shrink?
Tips, How to Use Automatic Bobbin Winder
- Always use the correct size and type of bobbin that fits your sewing machine
- Use good quality thread to prevent breakage and tangling
- Make sure the bobbin winds evenly and is not too loose or too tight
- Check the bobbin tension on your sewing machine or winder and adjust it if necessary
What are the advantages of an automatic bobbin winder?
Here are eight advantages of an automatic bobbin winder.
- Saves time and effort by quickly and efficiently winding bobbins.
- Ensures consistent tension and thread distribution for more precise and even stitching.
- Can wind bobbins of varying sizes and types, including nylon and silk.
- Reduces wear and tear on a sewing machine’s motor by removing the need to wind bobbins using the machine’s own power.
- Reduces the risk of overwinding or tangling thread on the bobbin.
- Enables the user to wind bobbins without having to stop the sewing process, resulting in greater efficiency.
- Makes it easier to maintain a consistent thread supply, reducing the need to stop and change out bobbins frequently.
- Can be used for embroidery work, ensuring consistent and precise thread distribution.
It’s not recommended to wind multiple bobbins at once as it may cause uneven winding and tangling.
Use a soft, dry cloth to wipe the bobbin winder clean. Avoid using water or cleaning agents as they may damage the machine.
If the bobbin winder is not working properly, first check to make sure that the machine is turned off and the bobbin is properly seated on the bobbin spindle. Also, make sure that the thread is properly threaded through the bobbin winding tension disc. If the problem persists, you may need to clean the bobbin winder or take the machine to a professional for repair.
The bobbin winder works by winding thread onto a bobbin, which is used to hold the lower thread in a sewing machine. The thread is typically wound onto the bobbin by spinning it around the bobbin spindle, which is driven by a motor or by turning a hand crank. The bobbin winder also has a tension mechanism that helps to ensure that the thread is wound evenly and tightly onto the bobbin. Once the bobbin is full, the bobbin winder will usually stop automatically.